
FASHION
How to Make Ring Box

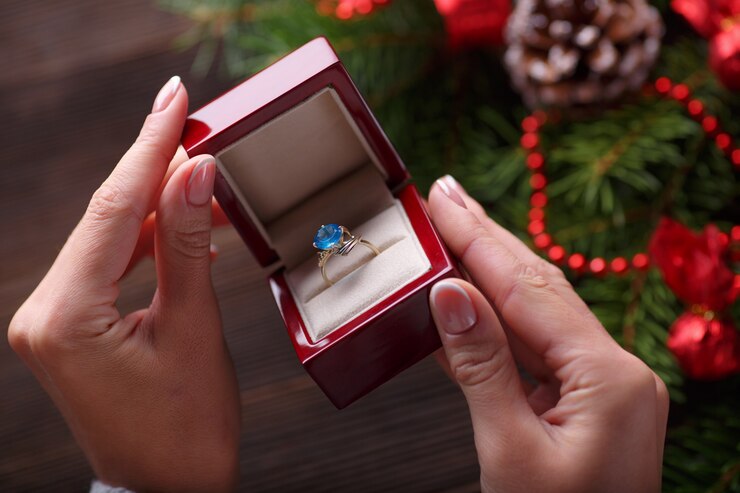
Creating a custom ring box is a rewarding project that allows you to add a personal touch to one of the most cherished pieces of jewelry. Whether you’re crafting a box for a proposal, a wedding, or as a keepsake, making your own ring box can be both fun and meaningful. In this guide, we’ll walk you through the process of making a ring box from scratch, using simple materials and techniques. Plus, we’ll introduce you to two of PackAQ’s premium jewelry boxes that could be the perfect solution if you prefer a professionally crafted option.
Materials You’ll Need:
- Wood or Sturdy Cardboard: The base material for the box.
- Fabric: Velvet, satin, or felt for lining the interior.
- Foam: To hold the ring securely in place.
- Glue: Wood glue or strong adhesive, depending on the materials used.
- Sandpaper: For smoothing edges if using wood.
- Paint or Stain (Optional): To finish the exterior.
- Decorative Elements (Optional): Ribbons, charms, or other embellishments.
- Hinges and Clasp (Optional): For a traditional opening mechanism.
Steps:
Step 1: Cut and Prepare the Base
Wood:
Start by cutting your wood into the desired dimensions for your ring box. A good size to aim for is around 2.5 x 2.5 inches, depending on the size of the ring. If you’re using wood, sand the edges and surfaces to ensure a smooth finish. You may also choose to stain or paint the wood to give it a polished look.
Cardboard:
If you’re using cardboard, cut out pieces for the base, sides, and lid of the box. The pieces should be cut precisely to ensure they fit together neatly. You can reinforce the cardboard with extra layers if needed for added sturdiness.
Step 2: Assemble the Box
Wooden Box:
Glue the sides of the wooden box together, making sure the corners are perfectly aligned. If you’re adding a lid, glue it to the back edge using small hinges or create a separate, removable lid. Allow the glue to dry completely before proceeding to the next step.
Cardboard Box:
Assemble the cardboard pieces using a strong adhesive. Ensure that each corner is securely glued. If you’re using a hinge mechanism, attach a small piece of fabric or thin cardboard to act as the hinge, gluing it to both the lid and the back of the box. For a simpler design, you can opt for a separate, removable lid.
Step 3: Prepare the Interior Lining
Cut the Fabric:
Measure and cut your fabric to fit the interior of the box. The fabric should cover the bottom, sides, and interior lid. This will give the box a luxurious finish and protect the ring from scratches.
Attach the Fabric:
Apply glue to the interior surfaces of the box and carefully press the fabric into place. Smooth out any wrinkles or bubbles to ensure a clean, professional look. Allow the glue to dry completely before proceeding.
Step 4: Create the Ring Slot
Prepare the Foam:
Cut a piece of foam to fit snugly inside the box. The foam will hold the ring securely in place. The size should match the interior dimensions of the box.
Cut the Slot:
Using a sharp blade, carefully cut a slot in the foam that will hold the ring. The slot should be deep enough to secure the ring without it moving around.
Cover the Foam:
Cover the foam with the same fabric used for the lining. Glue the fabric securely to the foam, making sure the slot is still accessible. Tuck the edges of the fabric into the slot to keep it neat.
Place the Foam:
Insert the foam into the box, ensuring it fits snugly and that the slot aligns correctly. The ring should now sit securely within the box.
Step 5: Add Hinges and Clasp (Optional)
If you want your ring box to open and close like a traditional jewelry box, attach small hinges to the back edge and a clasp to the front. Use small screws or strong adhesive to attach these components securely. This step adds a classic touch to your ring box and makes it more functional.
Step 6: Decorate the Exterior (Optional)
To personalize your ring box, consider adding decorative elements to the exterior. This could include a ribbon tied around the box, small charms, or a custom paint job. These finishing touches can transform a simple box into a unique keepsake.
Step 7: Final Touches
Before declaring your DIY ring box complete, take a moment to inspect all components:
- Ensure Stability: Make sure all glued parts are securely attached, and the ring fits snugly in the slot.
- Smooth Finish: If you’ve painted or stained the box, ensure the finish is even and fully dried.
- Test Hinges and Clasp: If you’ve added a hinge and clasp, open and close the box a few times to ensure everything works smoothly.
PackAQ’s Premium Jewelry Boxes
While making your own ring box can be a fun and rewarding project, sometimes a professionally crafted box is the best option, especially for special occasions like engagements, weddings, or gifts. PackAQ offers a range of premium jewelry boxes that combine elegance with functionality. Here are two of our top products:
1. Ribbon Jewelry Box
The Ribbon Jewelry Box is a beautifully crafted option that exudes elegance and sophistication. This box features a built-in ribbon that ties around the box, adding a luxurious touch to the presentation. The soft interior lining ensures that your ring is protected, while the sleek exterior makes it perfect for any special occasion. Whether you’re planning a proposal or giving a ring as a gift, the Ribbon Jewelry Box provides a stunning presentation that enhances the value of your jewelry.
2. Magnetic Rigid Jewelry Box
For those who prefer a modern and sleek design, the Magnetic Rigid Jewelry Box is an excellent choice. This box features a magnetic closure that keeps the ring securely in place while offering a seamless, minimalist look. The interior is lined with soft material to protect the ring, and the sturdy exterior ensures durability. The Magnetic Rigid Jewelry Box is ideal for both personal use and retail settings, offering a professional and stylish presentation that makes an impact.
Making your own ring box is a creative way to add a personal touch to a significant piece of jewelry. Whether you choose to craft one from scratch or opt for one of PackAQ’s premium options, the key is in the details. With a little time and effort, you can create a beautiful and functional ring box that will be cherished for years to come. If you prefer a ready-made solution, PackAQ’s Ribbon Jewelry Box and Magnetic Rigid Jewelry Box offer the perfect blend of style and practicality, ensuring your ring is presented in the best possible light. Explore PackAQ’s full range of customizable jewelry boxes and find the perfect one for your needs.
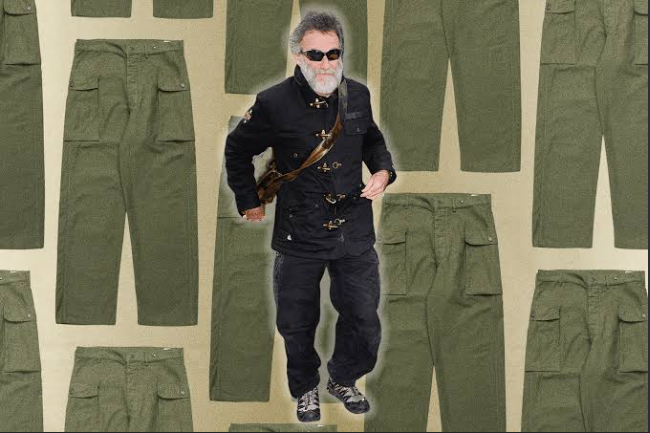
Fashion has a habit of declaring things dead and then quietly forgetting it ever said that. Cargo trousers have been written off roughly every five years since the late 1990s, and yet here we are in 2026 and they’re still everywhere. On the high street, on building sites, in parks on a Sunday afternoon. There’s clearly something going on that the trend forecasters keep getting wrong.
The honest answer is that they work. Not in an abstract, theoretical way, but in the actual practical sense of being a garment that solves a real problem. Men carry things. Phones, wallets, keys, the odd protein bar, a dog lead, whatever. Cargo trousers were built around that reality rather than pretending it doesn’t exist. That’s not a revolutionary observation, but it is the kind of thing that gets overlooked when fashion writers are busy declaring minimalism the only acceptable aesthetic.
They’ve Cleaned Up Considerably
The version most people picture when they hear “cargo trousers” is the early 2000s style, which was typically enormous, usually khaki, and featured enough pockets to pack for a fortnight in Tenerife. That silhouette isn’t really what’s being sold now, and honestly, good riddance to it. The current generation of mens cargo trousers sits much closer to a regular trouser fit, with the pockets scaled down so they don’t add a load of bulk to the thigh.
The fabric choices have improved too. Cotton twill, ripstop, brushed cotton for the colder months. Some have a slight stretch built in, which makes a genuine difference if you’re on your feet all day or doing anything that involves bending down repeatedly. It sounds like a minor detail until you’ve spent eight hours in trousers that don’t have it.
Colours have settled into something more wearable as well. Olive, navy, stone, charcoal grey, the occasional rust or burgundy for people who want to be slightly interesting. Most of the major retailers have moved away from the aggressive camouflage prints that made the early versions feel more like army surplus than everyday clothing. You can wear a decent pair of modern cargos with a plain white shirt and trainers and look entirely presentable, which wasn’t always a given.
Who Actually Wears Them and Why
There’s a certain kind of person who never stopped buying cargo trousers throughout the years people were supposed to have abandoned them. Tradespeople, outdoor types, anyone who spends time walking or cycling in British weather where conditions change roughly every twenty minutes. These aren’t people making a fashion statement; they just found something that works and stuck with it. The fact that the rest of the country has circled back round to the same conclusion is less of a trend and more of an acknowledgement that the practical contingent were right all along.
Older men, particularly those who are done with the idea of wearing uncomfortable trousers because they’re supposed to, have always had a soft spot for the style. A relaxed leg, a proper waistband that doesn’t dig in, storage that actually functions. That combination doesn’t go out of fashion for people whose priority is getting through the day comfortably. And that group is considerably larger than fashion media tends to assume.
Getting the Fit Right Matters More Than the Brand
The single thing that separates cargo trousers that look good from ones that look like you’ve borrowed them from a much larger relative is fit at the waist and seat. If they’re hanging off you around the hips, no amount of nice fabric or pocket detail is going to rescue the overall effect. Conversely, get the fit right in the seat and thigh and the pockets are essentially invisible when empty, which is the point.
Leg length is worth getting right too, especially if you’re on the shorter or taller side of average. A pair that puddles at the ankle or cuts off awkwardly mid-calf is going to look wrong regardless of everything else. Most decent retailers offer multiple leg lengths now, which wasn’t always the case, and it makes a noticeable difference. Worth checking before you buy, particularly online where you can’t just hold them up against yourself in a changing room and make a judgment call.
They’re not a complicated piece of clothing. That’s rather the point of them. But there’s a version that suits most men, and it’s usually closer than people expect when they dismiss the category outright.
An employee welcome kit should feel useful, not random. Many companies prepare gifts for new hires, remote teams, seasonal staff, or company events, but the items inside are not always used. Basic office supplies can be helpful, but wearable products often leave a stronger impression.
Cold-weather apparel is especially practical because employees can use it outside the office. A warm beanie, scarf, comfortable socks, or small winter accessory can make the welcome kit feel more thoughtful and personal.
The goal is not to fill the box with as many items as possible. A good welcome kit should include products that match the company identity, feel comfortable, and make employees feel included from the beginning.
Why Custom Apparel Works Well in Welcome Kits
Custom apparel gives employees something they can actually wear. Unlike disposable promotional items, a comfortable wearable product can be used during travel, team events, remote work days, or daily life.
It can also help create a shared team identity. The item does not need to look like a uniform. A small logo, simple color, or subtle patch is enough to connect the product with the company.
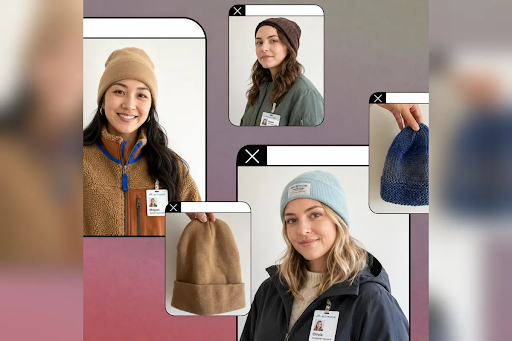
For cold-weather onboarding, custom beanies for employee welcome kits are a practical option because they are warm, easy to distribute, and suitable for many employees without complicated sizing.
Best Cold-Weather Items to Include
Beanies are one of the easiest apparel items to include in a welcome kit. They are compact, useful, and suitable for different people. Compared with jackets or fitted clothing, beanies also reduce sizing problems.
A cuffed beanie with a small embroidered logo or patch can look clean and professional. Neutral colors such as black, navy, gray, cream, or dark green are usually easier for employees to wear outside of work.
Scarves can make the kit feel warmer and more seasonal. They work well for companies that want a softer winter gift. Branding should be subtle, such as a small woven label or simple color detail.
Socks, gloves, or neck warmers can be useful add-ons. They are lightweight and easy to pack, but they should match the purpose of the kit. For general employee gifts, comfort matters more than heavy branding.
How to Choose the Right Main Item
A welcome kit does not need too many products. One strong apparel item can be better than several low-value items.
Before choosing the main product, think about how employees will use it. Remote employees may appreciate comfortable lifestyle items. Outdoor staff may need warmer accessories. Event teams may need products that help them look more consistent.
Sizing is also important. Hoodies and jackets require more planning, while beanies, scarves, and socks are easier to manage. For companies sending kits to multiple locations, simple sizing can make the process much smoother.
Branding Tips for Employee Apparel
Employee apparel should feel connected to the company, but it should not look like a walking advertisement. Subtle branding is usually more wearable.
A small embroidered logo, woven patch, side label, or tonal design can look cleaner than a large logo. Color choice also matters. Bright brand colors may work for some companies, but neutral base colors are usually safer for everyday use.
The apparel should also match the company culture. A casual startup, outdoor team, school program, nonprofit group, and corporate office may all need different styles. The product should feel natural for the people receiving it.
Add Small Accessories Thoughtfully
Small accessories can make a welcome kit feel more complete, but they should not be added only to fill space. Each item should have a clear use.
Socks are a good example. They are easy to pack, useful for daily wear, and can work for office teams, remote employees, fitness groups, or outdoor staff. If a company is comparing which sock style fits a kit best, this guide to the types of socks can help explain the differences between common options.
Other accessories, such as gloves or neck warmers, may work better for outdoor staff, winter events, or teams in colder regions. The key is to match the product with the employee’s real use.
Planning the Welcome Kit
Start with one wearable product, then add supporting items if needed. A beanie can pair well with a welcome card, notebook, mug, water bottle, scarf, or socks.
Presentation also matters. Even simple packaging can feel thoughtful if the products are folded neatly and arranged clearly. A short welcome note can make the kit feel more personal, especially for remote employees.
When choosing products, companies should focus on comfort, usefulness, and easy distribution. A smaller kit with better items often feels stronger than a large kit filled with products employees may not use.
Conclusion
A cold-weather employee welcome kit should be practical, comfortable, and connected to the company’s identity. Custom apparel can make the kit feel more personal than basic office items, especially when the products are useful in daily life.
Beanies, scarves, socks, and small winter accessories can all work well, but the best choice depends on the employee audience, climate, company culture, and budget.
The strongest welcome kits are not the ones with the most items. They are the ones where every product feels intentional and useful.

Have you recently been thinking about creating a perfume for yourself? The answer is yes then you will definitely need to know how to do that the right way. And, doing that the right way requires you to buy the right materials. This could perhaps help you create a great perfume for yourself.
As you may already know, creating perfume is artistic, but it also requires you to, well, know how frequencies are made I don’t know what you’re doing with them. Sourcing the right materials is therefore of utmost importance here. Whether you’re an aspiring perfumer or you’re simply curious about how fragrances are made you have to understand where to get the right ingredients.
The ingredients play a crucial role in shaping the final sense you’re trying to create. And, since you’re trying to create something beautiful you will undeniably need to source your materials successfully. You may not be sure about how to do that.
Well, that is exactly why we are here today. We are going to do is talk a bit more about how you can find the right supplier that will provide you with the perfect ingredients for your perfume. There are, of course, a few main ingredients did you have to think about. We’re talking essential oils, natural extracts, solvents and similar.
Now, whatever it is that you’re trying to buy for your perfume, that is, no matter what type of an ingredient you want to buy, the truth is that you will have to find the right supplier who stopped that is precisely what we are going to be talking about today, as mentioned. So, keep on reading to find out what it is that you have to do in order to find and choose the right supplier of your perfume ingredients.
If you need some more tips on how to create a perfume, here they are: https://www.wikihow.com/Make-Perfume
Ask Around
First things first, you may want to talk to the people you know and check if they may have some recommendations to share. Of course, the idea here is for you to talk to those individuals that have experience when it comes to creating perfumes for themselves, or to sell them, or for anything else for that matter. They may have already worked with some suppliers that have provided them with the right essential oils, absolutes, isolates, or anything else that you may want and need to buy. Those people can refer you to potential suppliers, and you can then check them out in more details.
Search Online
Apart from talking to the people you know, you should undeniably also do your best to search for these suppliers online as well. After all, those people around you may simply not be familiar with all the companies operating on this market and selling the aromas and the flavors that you want to add in order to create the perfect fragrance. On the other hand, the Internet is sure to be familiar with most of these, given that they will, well, have their own official websites to show for. Your task is, therefore, to find those sites and check them out in more details in order to ultimately make the best choice.
Check the Offered Ingredients
What is it, though, that you have to check in order to ultimately make the best choice? Well, first and foremost, you should check the ingredients that are offered by various suppliers. The idea here is for you to find a supplier that can provide you with everything you need, from those essential oils to the absolutes and isolates, so that you can buy everything at one and the same place. And, of course, you also want the ingredients you get to be of great quality, so that is something else to check before moving forward.
Read Some Reviews
Reading some reviews written about the different suppliers you are considering is also a smart move here. This way, you will get a better idea about the quality of the ingredients, as well as about the general reputation of the companies you are thinking of buying from. So, when you come across The Perfumer’s Apprentice, for example, or another great supplier, take time to check what the past clients are saying. And, of course, always aim at buying your materials from reliable and trustworthy companies.
Compare the Prices
Finally, you should compare the prices that are offered by the different professionals that can sell you these ingredients. The idea here is, of course, not for you to go for the lowest bidder and be done with it, but to actually find and choose those suppliers that are selling their ingredients at completely fair prices. So, take your time to compare the prices, but remember to keep all the other important factors in mind as well, so that you can ultimately make the best choice.
-

 HEALTH3 years ago
Transformative Health Solutions: Unveiling the Breakthroughs of 10x Health
-

 Posts3 years ago
Siegel, Cooper & Co.
-

 GENERAL3 years ago
Discovering the Artistic Brilliance of Derpixon: A Deep Dive into their Animation and Illustration
-

 Lifestyle3 years ago
Purenudism.com: Unveiling the Beauty of Naturist Lifestyle
-

 FASHION3 years ago
The Many Faces of “λιβαισ”: A Comprehensive Guide to its Symbolism in Different Cultures
-
 Lifestyle3 years ago
BaddieHub: Unleashing Confidence and Style in the Ultimate Gathering Spot for the Baddie Lifestyle
-

 Home improvement2 years ago
Unleash Your Creative Side: Exploring Stylish Rug Collections to Elevate Your Space with Quality Rug & Carpet Options
-

 PETS2 years ago
From Bows to Bandanas: Elevate Your Dog’s Style Game with These Trendy Accessories